

Create content pages
Content pages are the parts of your store that aren’t products — your About, Contact, FAQ, policy pages, and custom landing pages. In CIQRA you write them in the admin and publish them straight to your storefront.
Open the Pages list
Section titled “Open the Pages list”In the sidebar, find the Content section and select Pages. This opens the list of every content page in your store.
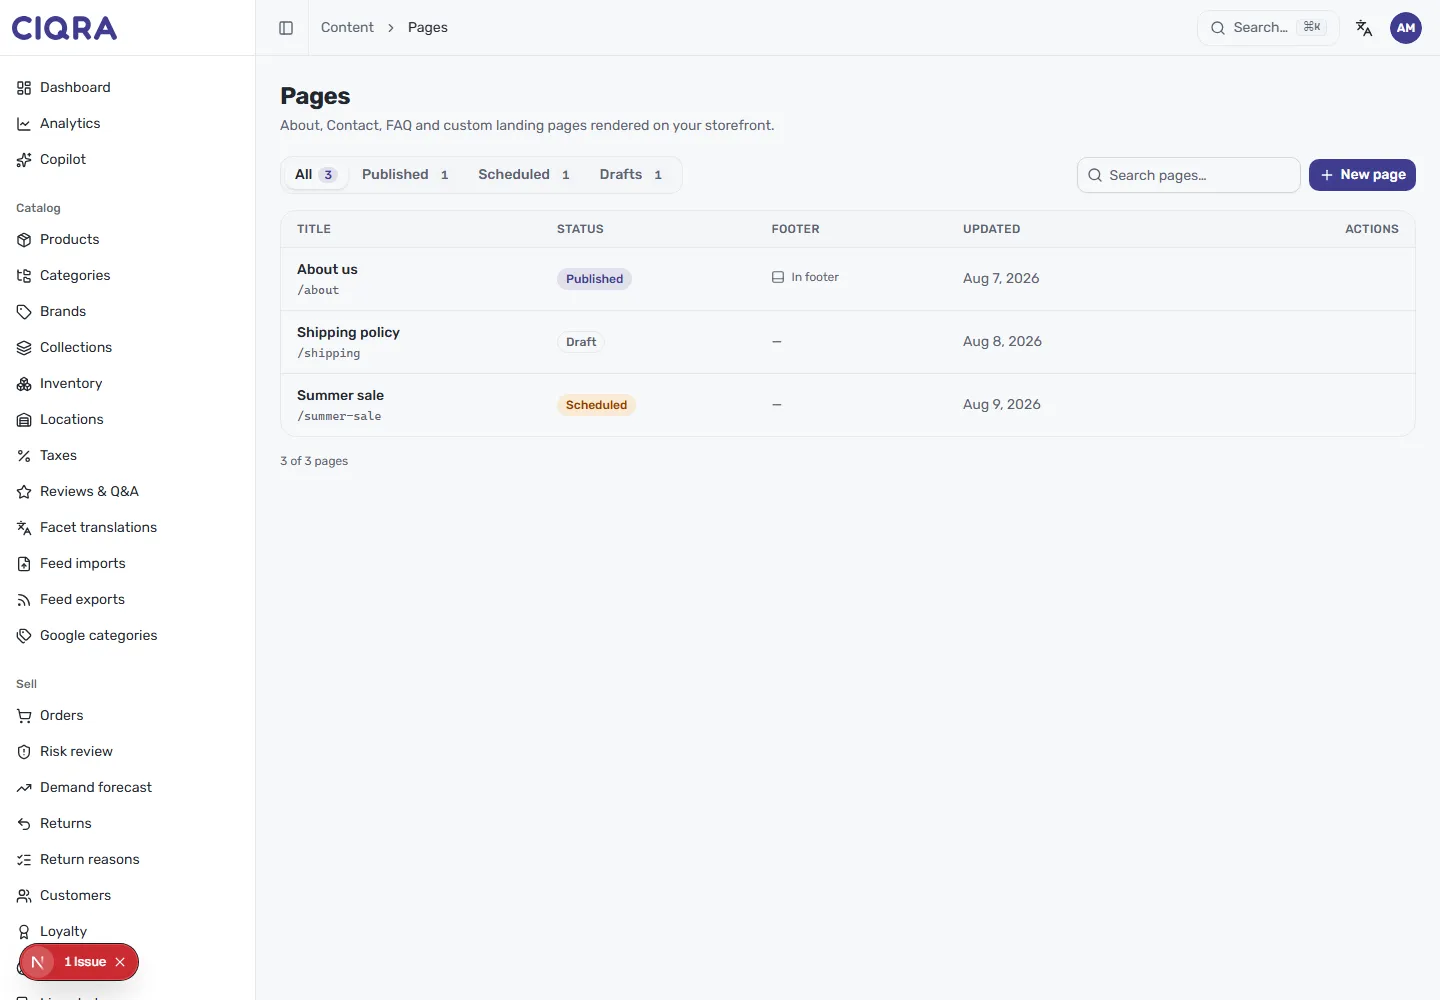
The list gives you a quick read on where each page stands:
- Status tabs across the top — All, Published, Scheduled and Drafts — filter the table, with a count next to each.
- Each row shows the page title and its slug (for example
/about), a status badge, whether it appears in footer, and when it was last updated. - Search pages narrows a long list by title.
Create a new page
Section titled “Create a new page”Select New page in the top right to open the editor. Everything you need sits on one screen — content on the left, publishing controls on the right.
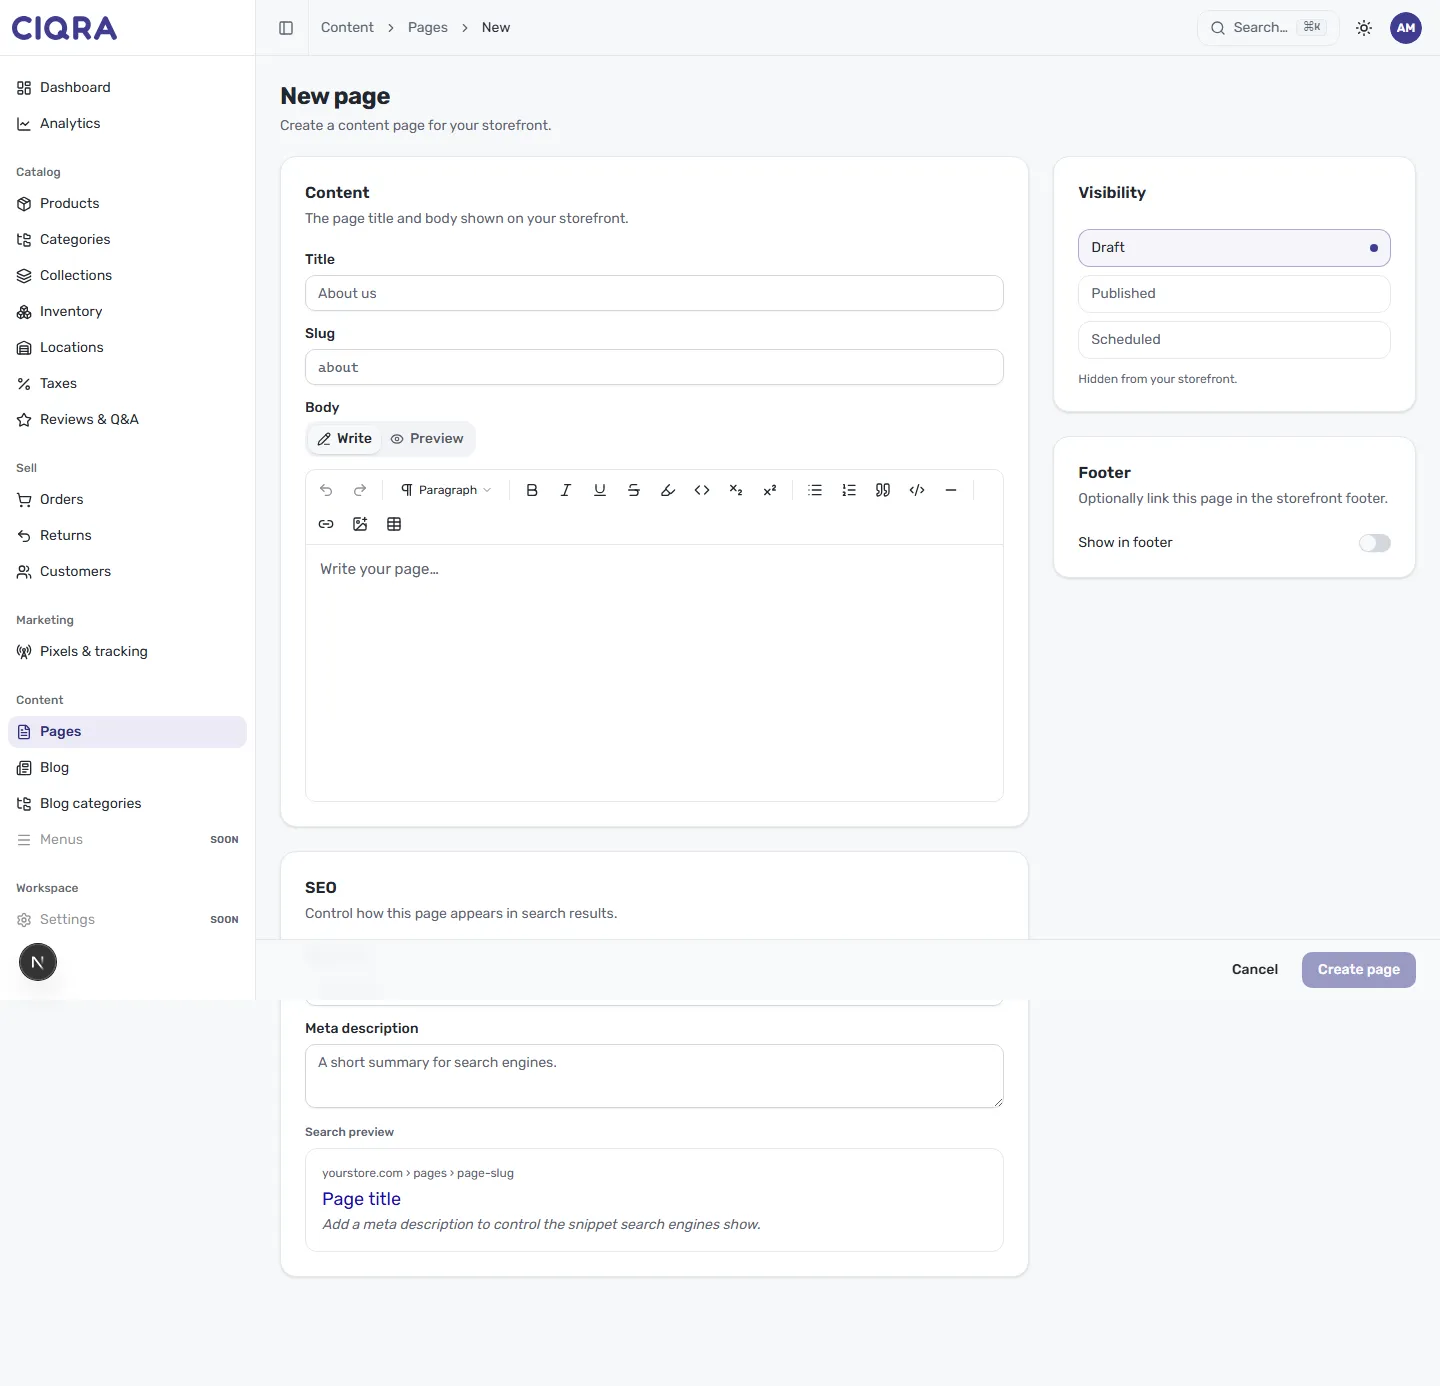
- 1TitleThe heading shoppers see, such as "About us".
- 2SlugThe URL segment for the page. CIQRA suggests one from your title; keep it short and readable.
- 3Body editorWrite and format the page — headings, lists, links, images and more.
- 4VisibilityDraft, Published or Scheduled — controls whether the page is public.
- 5Show in footerOptionally surface this page in your storefront footer.
- 6SEOA meta description and search preview that control how the page appears in search results.
Fill in the essentials:
- Title — the heading shoppers see, such as “About us”.
- Slug — the URL segment for the page. CIQRA suggests one from your title
(for example
about), and you can edit it. Keep slugs short and readable. - Body — write and format the page in the editor. See The content editor for the full toolbar.
Choose when it goes live
Section titled “Choose when it goes live”The Visibility panel controls whether the page is public:
- Draft keeps the page hidden from your storefront while you work on it.
- Published makes it live immediately.
- Scheduled publishes it automatically at a date you set.
Link it in your footer
Section titled “Link it in your footer”Use the Footer panel to optionally surface the page in your storefront footer. Turn on Show in footer for the pages customers look for by name — About, Contact, and your policies are good candidates.
Save the page
Section titled “Save the page”When you’re ready, select Create page. Your new page joins the Pages list, where you can reopen it any time to edit, reschedule, or change its status.