

Organize with categories
Categories organize your catalog “into a browsable tree” — the structure shoppers use to navigate your store. Unlike collections, categories are hierarchical: you can nest one under another and reorder them.
The category tree
Section titled “The category tree”Open Categories from the Catalog group in the sidebar. Each category
shows its slug (such as /apparel), a count like 12 products, reorder
arrows, and a ⋯ menu. Where a category has children, a chevron expands it.
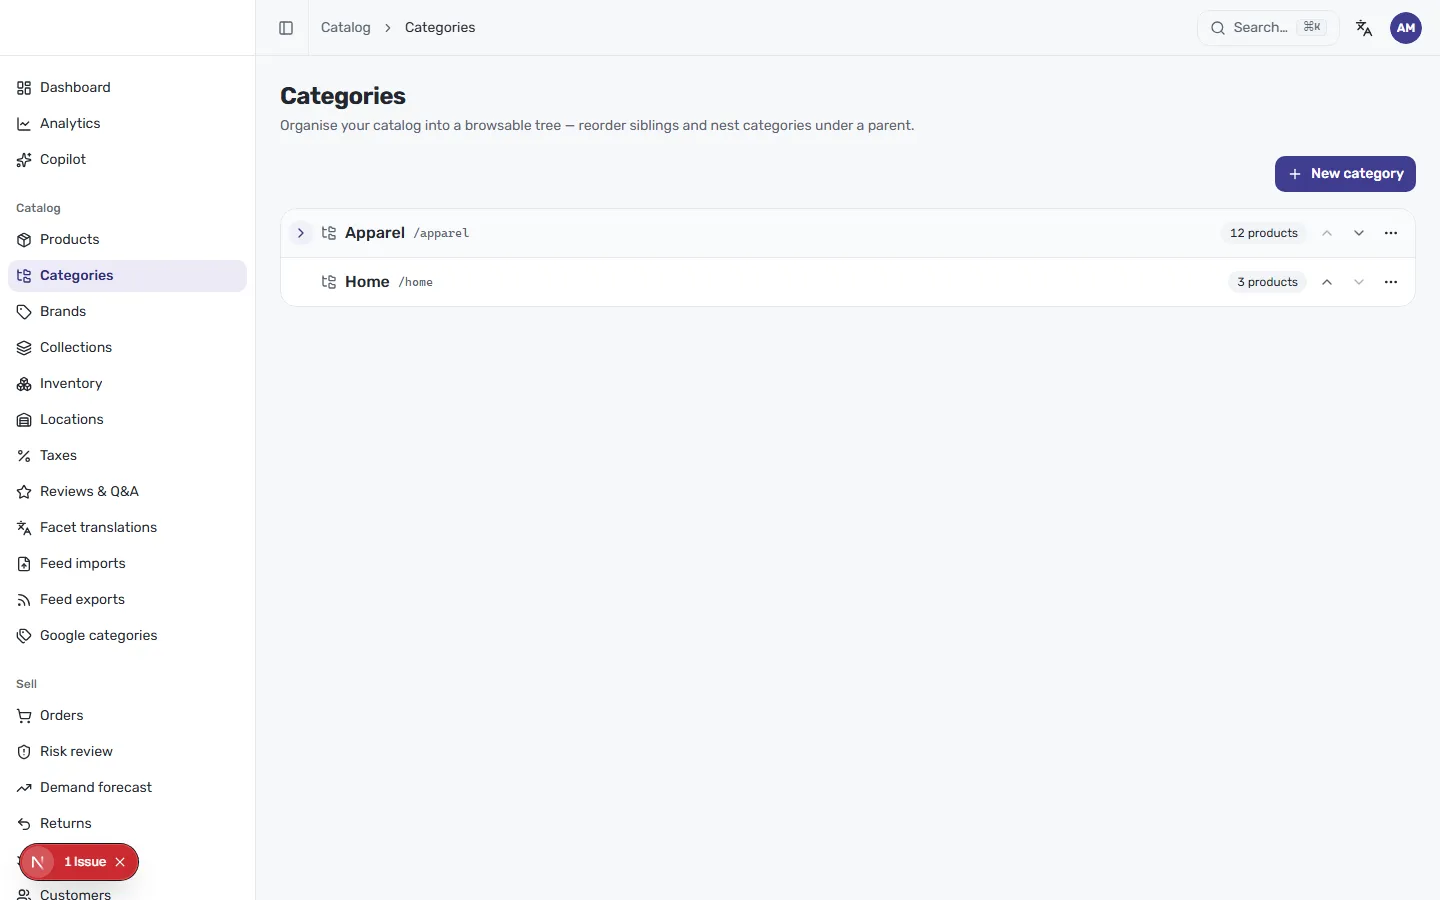
Use the up and down arrows to “reorder siblings” and the chevrons to expand a parent and see what’s nested beneath it.
Create a category
Section titled “Create a category”Select New category to “add a category to your catalog tree.” Under Details — “name, URL handle, and place in the tree” — fill in:
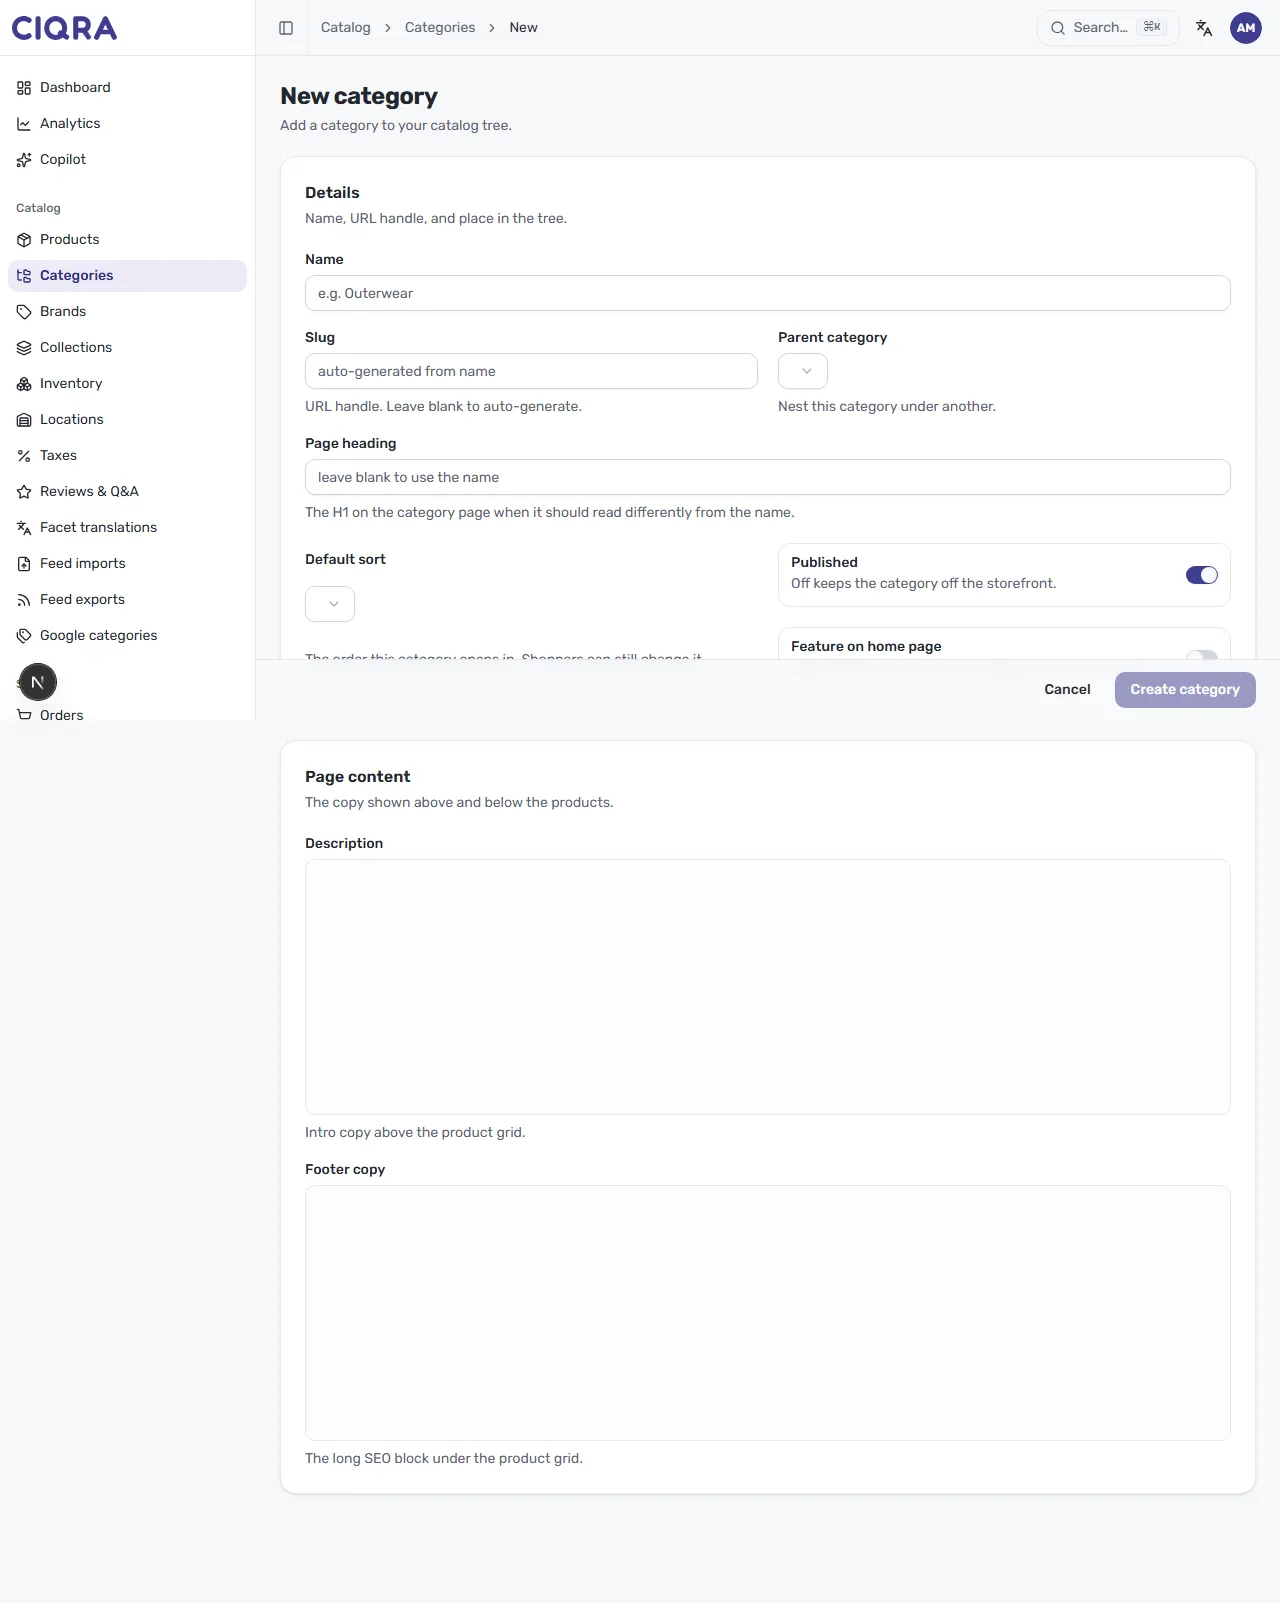
- Name — the label shoppers see, for example Outerwear.
- Slug — the URL handle. Leave it blank to auto-generate one from the name.
- Parent category — choose Top level (no parent) to place it at the root, or pick another category to “nest this category under another.”
Select Create category to save, or Cancel to discard.
Edit a category
Section titled “Edit a category”Opening a category shows Edit category, where you “update its name, handle, and parent.” Change any of the Details fields and select Save changes. Delete, at the bottom left, removes the category.

Assign products to a category
Section titled “Assign products to a category”On the same Edit category screen, scroll to the Products section — “the products in this category. The storefront browses them here.”
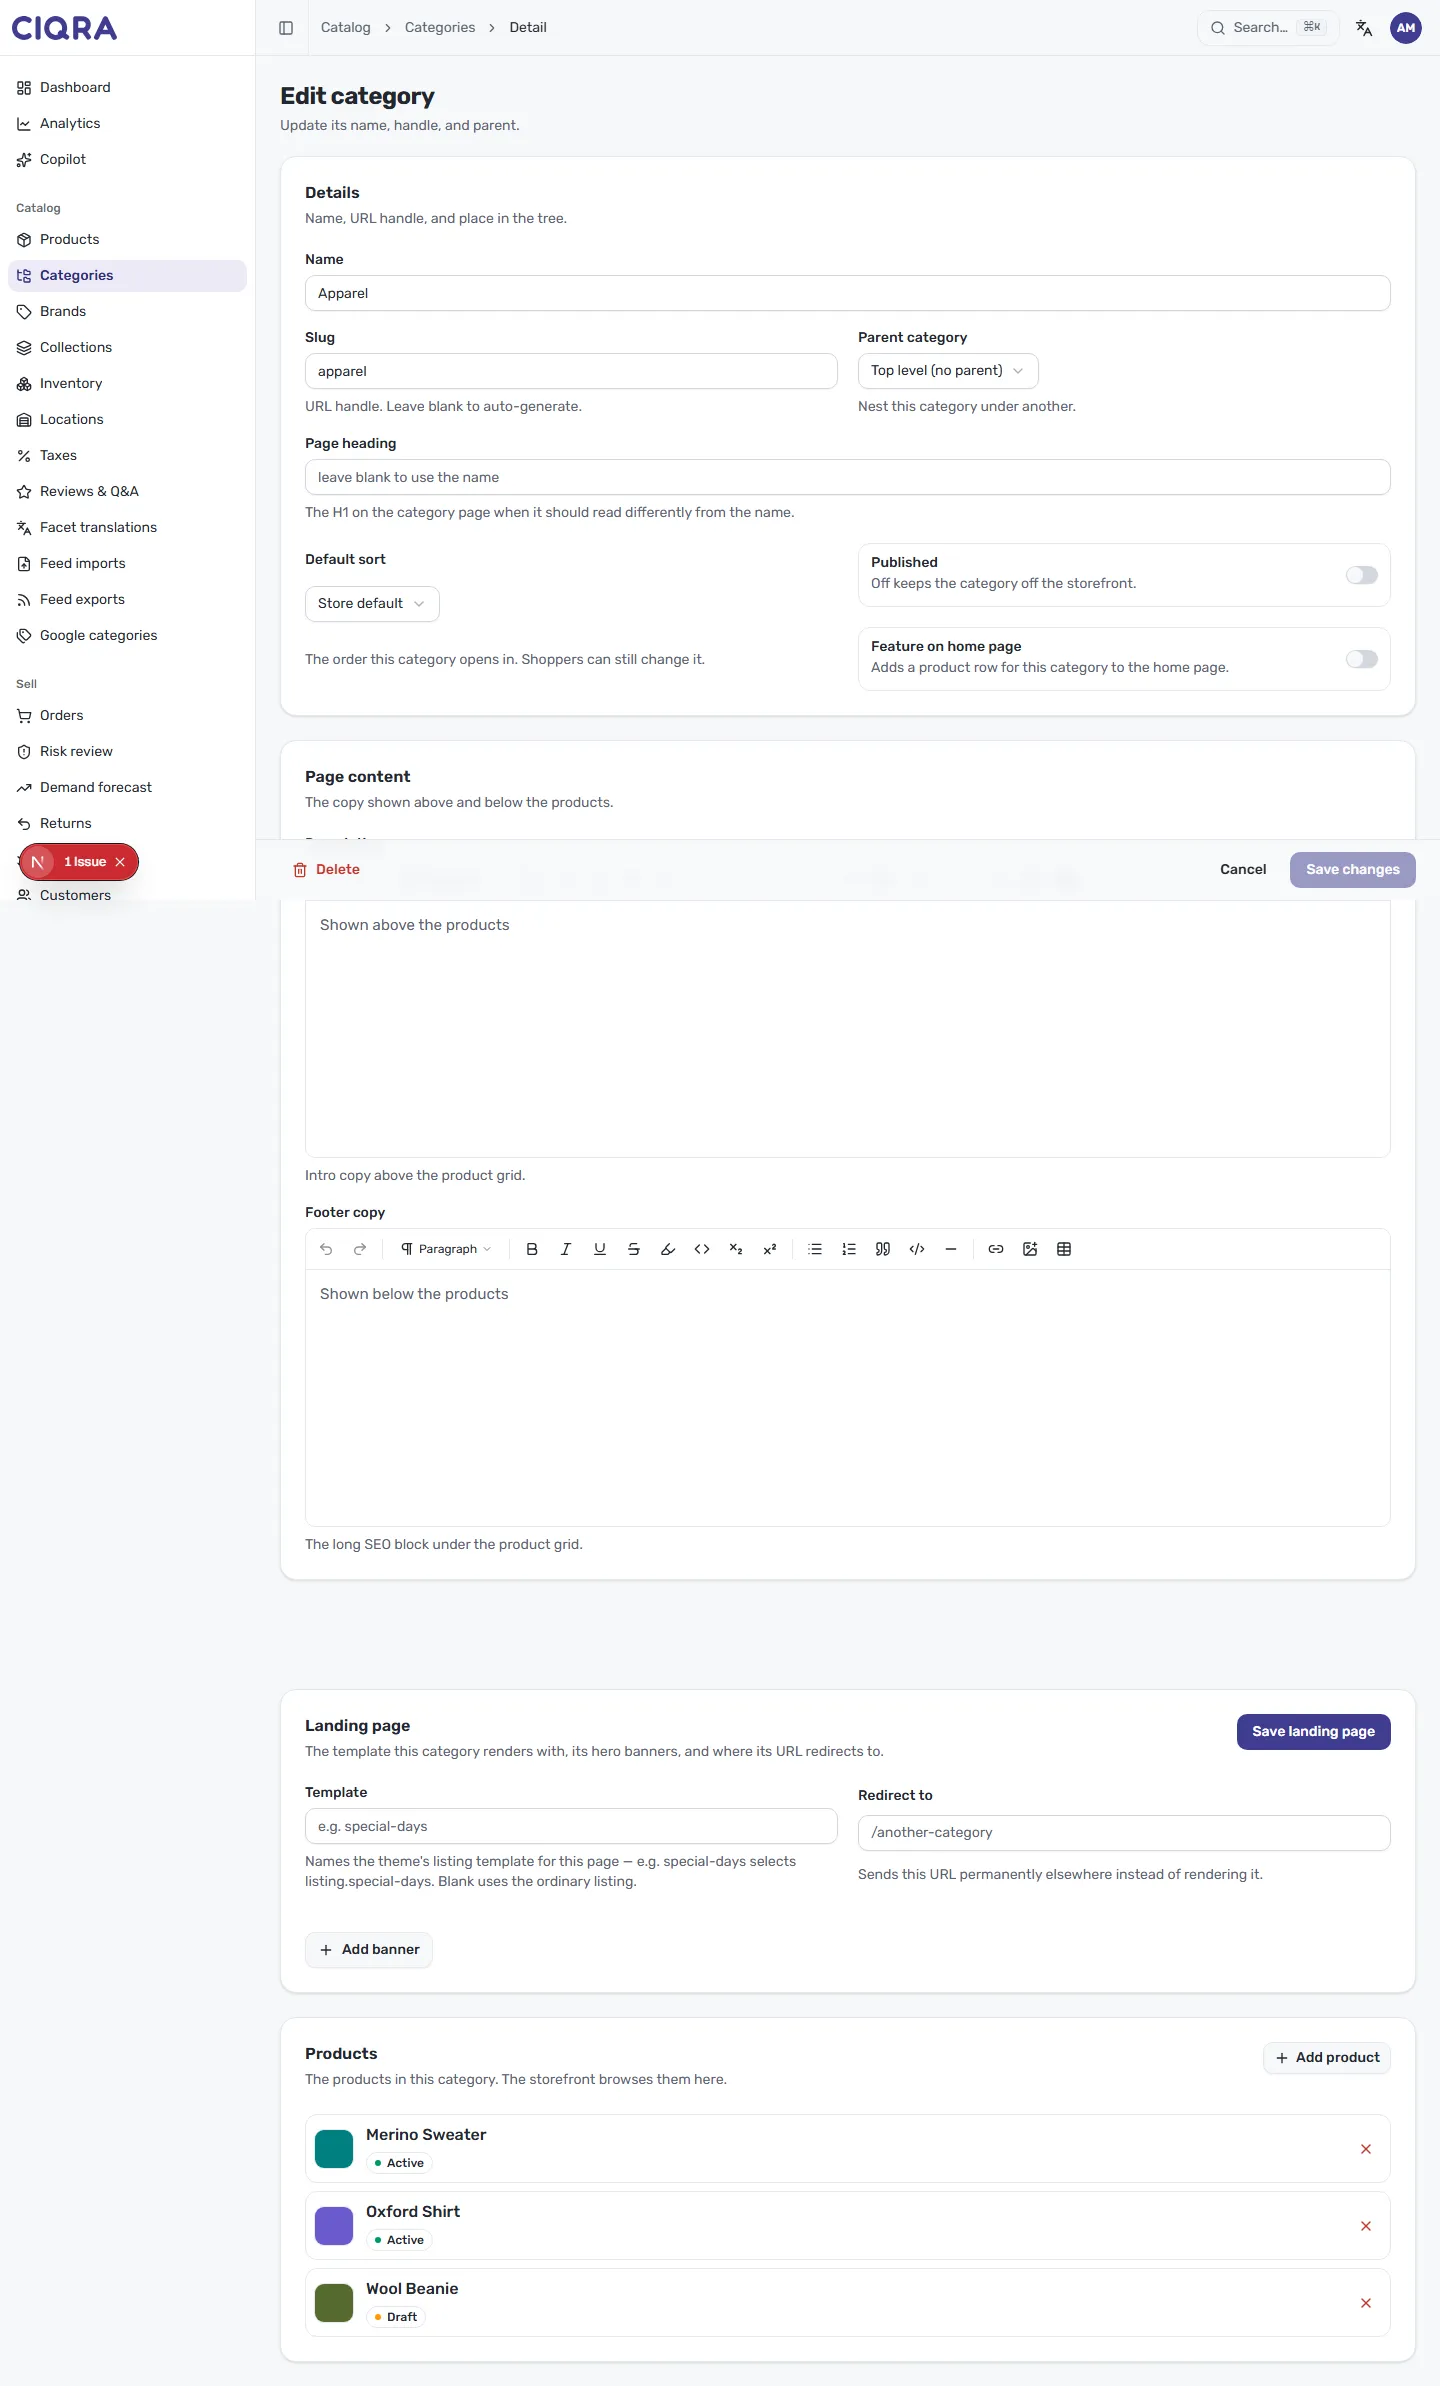
- Select Add product to include a product in this category.
- Each assigned product shows its name and status (for example Active or Draft).
- Use the × on a row to remove a product from the category.